Posts tagged with “vintage”
Posted on . Filed in . Tagged with , .

Don’t Touch the Bed Doll

A long, long time ago my Mother bought me a doll, a bed doll. It was a beautiful doll with an elegant white gown, ribbon flowers and her hair done up in a fancy way. I kept her for a very long time, but she was always made me sad. No fault of the doll. It was one of the things I did which I later regretted.

When we bought the doll my Mother explained that she was meant to be kept on the bed to look pretty. You don’t play with her, you don’t undress her (some of the dress was not meant to be taken off it was sewn on the doll body to an exact fit), most of all, you don’t un-do her hairstyle. I said I would remember all that and just have her sit on my bed. My Mom was hoping this would be another reason for me to get into the habit of making my bed each morning. Sadly, it didn’t work out.

I never get into the bed making habit. Worse, it was not long before my curious mind had to get to work on her hair. Well, some things you just can’t ever fix or put back the way they originally were. She wore the same dress, mostly untouched but her hair was never the same again. So, I always felt a bit bad for letting my Mom down.

Bed dolls seem an old fashioned thing now. But, I like the old fashioned, romantic things. I was glad to find a bed doll with a home made crochet outfit on Etsy. There were a few of them. I wonder if they sell well or hang around, waiting for some silly curious girl to come along and mess up their hair.
Posted on . Filed in . Tagged with , , , .

Polishing Silver: The Easy Way

Silver Polishing Made Easy

Polishing silver is easier than you might think. You don't need to buy silver polish or rub and rub and rub. Baking soda, boiling water and aluminum foil will get the job done.

Use a deep pan, deep enough for all the silver you want to polish to fit in the pan and be covered by water. Don't overload the pan. Too much silver to be cleaned at once will give you little result.

Cover the pan with silver foil (aluminum foil). You need the silver, shiny side facing out. In the bottom of the pan pour baking soda. I have even used older baking soda which had been open in the fridge for awhile. I used more of it but I was going to throw out the whole box so this was another way to recycle it and give it one more use.

You need at least two tablespoons of baking soda. More for a bigger pan or a larger load of silver. Don't worry about using too much baking soda - but make sure you spread it around over the whole bottom.

Boil water - you need enough to cover all the silver you want to clean. Load the silver into the pan. Let it make contact with the baking soda and the silver foil. If your pan looks cluttered, hold back and split it into two lots. It's worth only cleaning just a few at a time and having to do it over again rather than trying to get it all done at once.

The cleaning really happens in that first second when contact occurs as you pour in the bolling water. Always pour the boiling water in last and have enough to cover all the silver you are cleaning.

Have a cloth handy to dry the silver. Don't wait for the water to cool down. If you give it a wipe off you won't get spots from leaving the water to dry itself. The work is really done in the first minute. Rinse the silver in clean water to make sure all the baking soda is washed off.

If you did not get GREAT results try it again with just one piece of silver and a fresh package of baking soda or use more baking soda and make sure your water is still boiling when you pour it over. Or, I have had better results using a thicker silver foil paper versus the cheap, thin stuff you can buy in the dollar stores.

Always cover your pan with the aluminum foil This will save you from having to clean it afterwards. The tarnish will be on the foil which you can throw away.

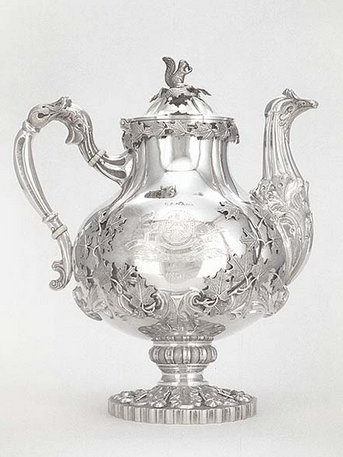
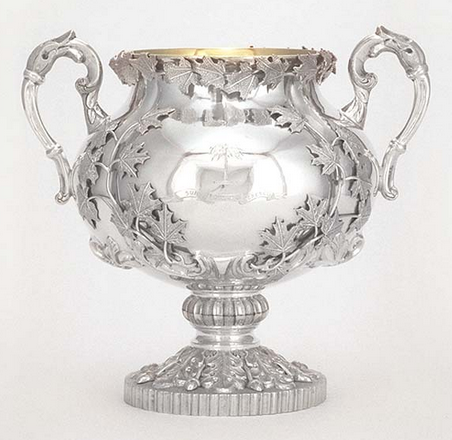
Last note, there is a smell from this process. It will smell strongly of sulfur. Open a window or run a fan if you are sensitive to it. Tea Service Presented to John Leeming, 1851. Source: National Gallery of Canada

Posted on . Filed in . Tagged with , , .

Vintage Bling: Charm Bracelets

I like old fashioned things for young women. I'm also a history buff, a bit traditional with a cultural slant. So, charm bracelets are one of the things I have always liked. I have one.

My Mother bought me the bracelet and gave me the first few charms which I added to the chain. Later, my Dad brought me back a few more charms from his business travels. I have one which came as an oval picture frame and we had a photo of my sisters and myself inside the charm. But, that photo faded to almost nothing and now I can only see an outline of my sisters and I really. But, I know it's there.

That's another aspect to the charm bracelet. Each charm is a preserved memory. Something representing a moment in your life. An event, like a wedding or your first big trip overseas. A person, like the charm your Grandmother gave you one Christmas with the thistles of Scotland, her home country. Or, something just special to yourself, like a flying saucer charm because you really love science fiction and hope all your dreams of aliens from space aren't just wishful thinking.

Some Charming History

Charm bracelets may have started as an amulet to ward off bad luck or evil spirits.

In prehistoric times charms were made from clay, shells, and animal-bones. Gems, rocks and wood would have been used later, as tools evolved. As people and charms evolved they were also protection from spirits and in battle. Charms were also used to identify affiliation with religious and other types of groups.

The first charm bracelets (versus charms kept individually or worn in other ways) appeared 600 – 400 BC.with the Babylonians and some time later the Assyrians, Persians, and Hittites.

Queen Victoria brought new popularity to charm bracelets when she designed her own charm bracelet to mourn the death of her husband, Albert.

The Industrial Revolution brought changes all over but it meant items like jewelry became easier and cheaper to produce, thus they became available for the common people, not just those who were able to afford the more exclusive and valuable jewels.

In 1889, at the Paris Exposition, Tiffany & Co launched a chain link bracelet with a single dangling heart pendent. The charm bracelet became fashionable.

Soldiers from World War II brought charms/ trinkets home as souvenirs from local craftspeople in the areas they had visited during the fighting.

In the 1950's and 1960's charm bracelets were created to reflect life events. Movie stars, like Elizabeth Taylor, wore charm bracelets which brought more interest for teenagers to have charm bracelets of their own.

Posted on . Filed in . Tagged with , , , .

Toilet Roll Doll: Restore and Repurpose Dolls

Shopping or Buying One is Limiting - Why Not Design and Make Your Own?

Did Your Grandmother Have Dolls in her Bathroom?

I remember these from my Grandmother's house, in the bathroom. She knitted her own from patterns that have disappeared along with most of her stuff after her death years ago. I don't know how to knit (I learned to crochet on my own) but it would have been nice to have some of her old knitting patterns. Sometimes I see interesting or unusual patterns in the thrift store but I don't buy them. I don't knit after all.

The History of the Toilet Roll Dolly

There isn't a lot of history to the dolls. In the 1960's they began appearing in North America and likely various Common Wealth and European locations too. I can only vouch for those I saw in Canada, mainly Ontario.

I expect the idea came along when there was extra yarn, some time for a new project, maybe a broken doll and the idea was born. Pretty up your bathroom. In the 1960's there were other home made fashions in the bathroom. I can think of toilet seat covers, something I haven't seen a big return on with all the vintage and retro ideas. You could co-ordinate your doll's dress with your pretty toilet seat cover, the bathroom floor rug and anything else already decorating the bathroom. Maybe that was how she really got started. Not only could you add more home made crafts, more colour and keep that broken doll around for a reason but you could ... make it all shades of pink matching.

There was likely some idea about modestly hiding that unsightly naked toilet roll too.

Specifications for Making Your Own Toilet Roll Doll Cosie

I have yet to see a vintage pattern for those old toilet roll cover dolls. That's how I started writing about them today. I'm seeing what I can turn up online.

I can find an endless supply of the little dolls at thrift stores. They are abandoned by children everywhere, so it would be a good way to recycle/ repurpose some of them. You can pick and choose from weird blue hair colour to a weird blue skin colour and the standard human shades of brown colours too.

The only thing that matters about the doll is her height and width. She can't stand too tall and tip over inside the toilet roll. She also needs to be the right width to fit through the centre of the cardboard roll from about the waist down. Mainly her legs need to be inside the roll as the skirt of her dress covers the toilet paper roll - that leaves her above the roll from the waist up.

What do you Call your Toilet Roll Doll?

I guess you could properly call them toilet roll cosies, or toilet roll toppers too. I never found out what my Grandmother actually called hers. I always enjoyed seeing them though. She never made one for me, that I can remember. Maybe she just thought they weren't really anything special. But, they were.

Posted on . Filed in . Tagged with , , .

Miss Dolly on the Shelf

Do you remember this doll? I spotted this poor girl in a GoodWill thrift store this week. She was not in great shape, some hair had caught on something and pulled loose from her updo. Her dress was torn and she was a little dirty. Not things I couldn’t fix but as nice as it was to revisit my girlhood, I did not want to take her home. I had one very much like her, about 30 years ago. My girl wore purple instead of yellow. Next time I go to this store I will be tempted to check around the shelves and see if she is still hanging around.

But, do you know what the doll is called? That’s the big trivia question. I did not. I had to look for it online. Thank you to Dollkind.com. She has written a whole post about… Bradley Dolls. There are a lot of variety to them. Far more than the type above (which was the only type I had seen among my friends and in the stores at the time). You could have ordered a Bradley doll from the catalogue, back in the late 70’s and early 80’s. I’m not going to repost the history and information from Dollkind, I strongly suggest you check there and read if you are interested. One thing I did like to find out – people were making clothes for these dolls themselves. I used to like sewing, still do but don’t get much done. I’m surprised I didn’t get into sewing fancy dresses for my Bradley doll. I still design lovely gowns in my own mind, they just don’t make it beyond that point.

I found two groups on Flickr for the Bradley dolls. One for Bradley dolls in general and the other for Bradley sitting dolls.