Posts tagged with “ascii art”
Posted on . Filed in . Tagged with .

ASCII Art Hidden in Source Code

Now and then if you look at the source code (the HTML code) of websites you can find ASCII art. Its like a secret surprise for those who dig a little deeper. Have a look at - ASCII Art Signatures in the Wild.

You can add ASCII art to the source code for your own site or blog.

Choose the ASCII art you want to use. Make your own ASCII art or borrow art created by someone else. (Don’t forget to keep the artist credit/ initials with the work).

Open the source file in a text editor. Notepad (the software which comes with Windows) will work.

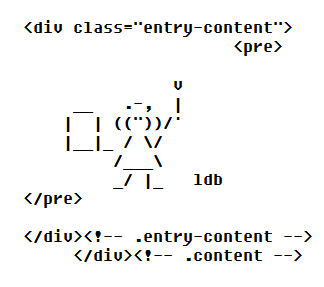
Pick the place you will add the ASCII art – make sure you don’t break the HTML code because that would mess up your site.

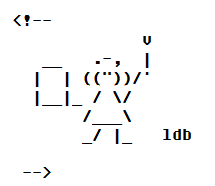
You need to add some simple HTML code before and after the ASCII art.

This code prevents your ASCII art from showing on the page – instead it is like a note you have left to yourself in the code. Only people looking at the actual HTML code can see what you place in this particular HTML code.

Then save the file and close it.

Welcome Mat.co shares the code for adding a “Welcome” to the HTML code of your site.

Posted on . Filed in . Tagged with .

How to Create ASCII Art (Text Pictures) with Your Keyboard

Whether you know it as ASCII art or didn’t know a proper name for all that text art made with standard keyboard characters, you can do it yourself. It really is much simpler than you may expect.

I’ve been creating ASCII line art since 1997. After a few years I left it behind, there were so few places I could still use it once email became HTML instead of plan text. Now ASCII art seems to be making a come back for cell phones and other new technological gadgets which can send simple graphics, in text.

Start with an idea of what you would like to create. Get an image in your mind and then draw a rough sketch, look for a clip art image online or any other way you can get a visible image in front of you. When you are starting and still learning it is important to keep the image clean and simple. Stick to something with only a few lines and not many round shapes. (Circles are one of the more complicated shapes to create and will take some practice.)

Once you have your image where you can see it, open a text editor. I still use the plain, old text editor that came with Linux. You can use Notepad in Windows, it is simple – you will already have a fixed width font ready to use. If you use a graphic editor or anything other than a basic text editor you will need to make sure the font is fixed width. This means all the characters (letters, numbers and symbols) are the same standard space apart from each other. From W to I they take up the same amount of space. Other fonts will give you a very different result and are harder to work with when it comes to displaying text art. (At the very least they will always lean to the far left).

I like to be set up with my text editor taking up about half the screen and my inspiration image/ picture on the other side (unless it’s a print image and then I prop it up in front of me on my desk).

The first thing I do is make some empty working space on the text editor. Just use the enter key to go down a few lines. Start working on a level that is comfortable for you to view – not too high or low on your screen.

No one can tell you exactly what characters to use. That is all up to your own judgement. Base your choices on what will fit/ suit the image you are creating from. Look at the direction the lines go and then find a keyboard character that will work. Take your time, change your mind a few times, try different numbers and letters as well as the basic shapes with / \ | > ( ) < and the small dots from punctuation characters ‘ . -

Use the space bar to move to a new spot you want to type in. You need to create the blank spaces in order for them to appear. This is a time when the mouse is second fiddle. The enter or carriage return will take you to a new line. Backspace erases anything you want to change. This may seem obvious but we have grown comfortable using the mouse – it does take getting used to just working with the keyboard.

`As you work notice how different characters set on different levels. Some are higher and some lower. Use this to your advantage. _ , – ‘ ``

When you want to make eyes there are a lot of options @ o 9 a e b q p d c g 6. Try them all. Each gives a different personality to the image. A combination of q p (for instance) can create eyes and a nose or snout.

Take a look at letters like Y T and W. Those will give you some basic shapes too. When you create smaller ASCII text pictures the shape of letters and numbers matter and can give you exactly what you need in a small space. Y makes a nice nose for a cat’s face.

For making a box I like to use .——. to join it to the sides at the top and then .____. to join it to the sides at the bottom.

For shading/ making a dark area # works well. Some people get more complicated and create greyscale ASCII art. This takes some practice, some familiarity with the keyboard characters and how they combine to create a finished image. Don’t try something too complicated for your early work.

Experiment and learn as you work. Look at the ASCII art done by others and see how they used different letters, numbers and characters to create the shapes they wanted. Think of it as a puzzle, a jigsaw puzzle, where you are fitting the pieces together to create the complete image.

If you have a print image you can hold it up to your screen and match your text to the shapes by comparing how they fit under the paper it’s printed on. I never did this myself. It seems to take away some of the creativity and ingenuity for me. But, if that gives you the will to keep trying, go ahead and do it.

Leave a couple of lines above and below your finished ASCII text art. I also like to keep my work a few spaces over from the left hand side of the screen edge.

Once you are fairly happy with your creation save the text file on your computer. Give it a name and add it to your hard drive. If you have software to capture your file as a graphic image file you can do that too. I just use a screen capture that lets me pick the size I want to save instead of the whole screen. It is much easier to share and post text/ ASCII art in an image file.

Don’t forget to add your artist initials to your finished work. ASCII art is usually shared freely, often adapted by other artists (diddled as we used to call it in the ASCII art newsgroup) but the initials should be kept with the art as respect to the original creator of the art. Plus, when you find something you really like you have a chance to find more of it when you know who made it.
Posted on . Filed in . Tagged with .

Another Look at Formatting Code for Posting ASCII Art

I found a blog posting ASCII art in small text files, cleanly. Quite a nice achievement. I took a look at the code and copied it, but it did not work the same way for me. So, I am looking into it. There may be more to the code than shows on the blog post HTML code. Or, I will see if I can find a way to post a plain text file embedded in the post.

Posted on . Filed in . Tagged with .

Posting ASCII Art as a Web Gallery

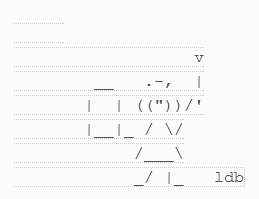
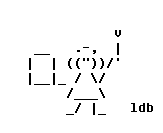
Which image shows the ASCII art better? One is a screen capture of ASCII art I posted as text to a blog. To display it as text rather than an image file (png, jpg or gif) I have to be satisfied with those lines running through it and the gaps too. I don’t like it, but so far it’s the best solution I have found to the problem of displaying text in an HTML world. I prefer using screen capture to display the ASCII art so it can show as I created it, in the text file.

Likely this is getting confusing for anyone who has not had the problem of making ASCII art work to be shown on the Internet.

I used to post ASCII art to HubPages and other online sites. I seldom do now because several people were leaving comments about the images being posted as an image file instead of as a text file (which they could grab with cut and paste – using without permission or assuming ASCII art is all free to take).

Well, I had set it up to display as an image gallery, just like photos, paintings and so on. The artist does not bring paint cans to the gallery and try to recreate all his or her work for the display. I see the ASCII art the same way.

Mainly, it is very difficult to get the ASCII art to display in plain text. Each site uses different software, HTML code and fonts. Every time I want to post ASCII art as text I would have to figure out how it will work on each individual site and sections on the site itself could be different. I did find some things which worked, sort of.

For blogs I found a plugin which displays the text in the right format but, it leaves it choppy looking, with bare lines between. I don’t like the look of it – but it is the best I have found so far. I’m still using it on this blog and my other blogs if I post a few ASCII art pictures I find on the web.

At this point I am done with trying to post text files anywhere online but in an actual text file which can be a clickable link from the HTML web page. Keep it simple.

If people want to complain they can go ahead and do so. But, no one should complain without offering me a solution to the problem of posting text in an HTML environment. If you don’t have a real solution, you should not complain about the solution I have found.

Posted on . Filed in . Tagged with .

ASCII Art as Alt Image Tags

Not everyone tinkers with HTML any more. If you have and know what the alt image tags are (and where they are) you could give this a try. It’s not so practical now that almost no one uses a text based web browser. In the early days of the Internet a text based browser was practical because there were few images and if you stuck with text only web surfing you could be much faster in the days of dial up modems.

As you can see below the code is basic HTML for adding an image with the addition of the alt attribute to describe the image. This alt tag is still practical for people who concern themselves with SEO. Mainly it is good for keeping your site accessible for those who are vision impaired and have technology which will read those image tags but be unable to describe the image unless the tag exists to be read.

To do this, have your ASCII art ready. Create an ASCII image to go with the graphical image you are using.

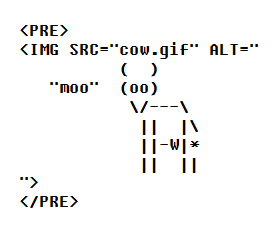
In your HTML code include the entire <IMG> tag inside <PRE>…</PRE> tags, and put the ASCII art inside the ALT attribute. (See the image below which I recreated and then cut and pasted from the site where I found this idea.)

With this code a text only web browser would pick up only the image text and thus show your ASCII art picture. The ASCII art picture would not benefit the vision impaired web reader/ browser. So it is a good idea to add a word to describe your image along with the ASCII art picture.

Do not add text before or after the image itself. It will work as part of the image. Keep it all between the quote marks and the PRE tags (which tell the web browser this is pre-formatted information which should be kept “as is” with line breaks and spaces).