I had the idea for an upsidedown cheesecake. Thinking it would have more fruit and less crust. The crust could be just a sprinkle of a nice crumb on the top. I didn't find a recipe I wanted to try, most were for pineapple upsidedown cheesecake, looking like a flip on an outdated idea with pineapples and cherries. Still, it would be a start to trying the idea with different fruit.
I did find a recipe for apple pie cheesecake which looks really good. I only wonder how the pie crust on the bottom is cooked, and not burnt. I think that would be the tricky part. I will try the recipe sometime with my niece. Leaving myself the link and the recipe here so I know where to get it.
APPLES: The best apples to use for baking include Honey Crisp or Granny Smith. Apples should be peeled and sliced.
CHEESECAKE: Just like our homemade cheesecake, this layer needs just 4 ingredients. Cream cheese, vanilla, sugar, and eggs. Simply mix and pour.
Cheesecake:
- 24 ounces cream cheese softened, 3 x 8oz packages
- 1 cup granulated sugar
- 1 teaspoon vanilla extract
- 3 large eggs, room temperature
Make Cheesecake Layer: Combine cream cheese mixture & fill the pie crust.
Make Apple Mixture: In a separate bowl, combine apple filling. Gently place on top of cream cheese mixture.
Add Crust: Top apples with second pie crust.
Ingredients
- 3 cups all purpose flour
- 1 teaspoon salt
- 7 tablespoons unsalted cold butter cubed
- 7 tablespoons shortening cubed
- ⅔ to 1 cup ice cold water
Instructions
Combine flour and salt in a large bowl with a whisk.
Using a pastry cutter, cut the butter and shortening until the mixture resembles the size of peas.
Add ice cold water a tablespoon at a time to one area of the dough and mix with a fork. Move to one side of the bowl and continue adding water just until dough is moistened (you don't want it to be sticky).
Once mixed use your hands to quickly and gently fold over the dough a couple of times. Divide into two balls.
Roll one of the balls into a 12" circle on a lightly floured surface.
Gently roll the dough onto a rolling pin and unroll over a 9" pie pan. Cut the edges so you have about ½" overhang.
Crimp the edges and bake according to recipe directions.
Tips for perfect pie crust
- Make sure the butter is COLD for the flakiest crust.
- Use just enough water to hold together.
- Mix only until the fat pieces are pea sized.
- Handle the dough as little as possible.
- If time allows, chill the dough before rolling.
Bake (per recipe below) & serve.
VARIATIONS: Sprinkle with a few pecans, and drizzle with this homemade easy caramel sauce. Or, serve with ice cream! Skip the top crust and use an apple crumble topping instead.
Tips for Perfection
- Cream cheese should be softened to room temperature.
- Don’t overmix the cream cheese mixture.
- Ensure the apples are thinly sliced so they cook through.
- Be sure to cut slits in the top crust so that steam can escape.
- For a glossy crust, combine one egg with 1 tablespoon of water. Wisk until combined and brush over the crust.
- Depending on your apples, the pie can sometimes bubble over so place the pie plate on a pan lined with parchment to save my oven any mess.
I've made a sketch for ASCII art before too. Never thought to make a video showing it. Probably still won't but the idea is in my brain now. For ASCII art sketches I draw the text characters in place and work out how they fit together smoothly when I work in Notepad.
Crochet flowers can look delicate and lacy or striking and bold. Use your crocheted flowers to decorate other projects like sweaters, teapot cozies or purses. Crochet flowers are added to so many crafty creations. Sometimes I see them even in the Dollar Store, added to hair accessories. Of course, those are machine made crochet flowers.
You can make your own flowers in crochet. Most of the patterns are simple, especially if you have already mastered the art of the basic granny square.
I like various forms of flowers, other than living flowers, because I have allergies and asthma. I'm not allergic to many plants (luckily). Strong smells like perfume do bother me. Also, once cut flowers are in your home they begin to rot, water goes stagnant and mould grows. That is one of my big allergy and asthma problems. So, I like a variety of other options when it comes to having flowers.
Another plus with making your own flowers is choosing your favourite colours for them. I love red. Blue is not a favourite colour for me but I do love shades of blue with white. There are other colour combinations I really like but would not be able to find exactly as I like them in nature. You can create flowers in every shade of pink, orange or even green if that's what you like. Or, combine pink, purple and green in the exact shades you want. Or, create the flowers to match the room you plan to display them in.
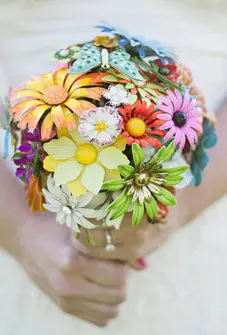
Crochet Flowers as Brooch Bouquets?
I really like the brooch bouquets, created with sparkling jewels and formed into a floral bouquet. So I was really liking the idea of doing the same thing with crocheted flowers. Maybe this will catch on and become more popular than the jewelled bouquets. Or, maybe not. But, they are still very beautiful, if not so glittery.
I collect bone China bouquets. They are delicate, fragile and romantic.
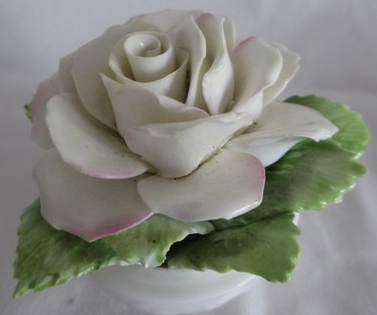
I started collecting bone China posies when I inherited a small white bowl with three coloured roses in it. I have always had a romantic side and I like history and anything vintage. I loved the China flowers from my Aunt Sally, my Grandmother's sister. I kept them, just a collection of one, for many years.
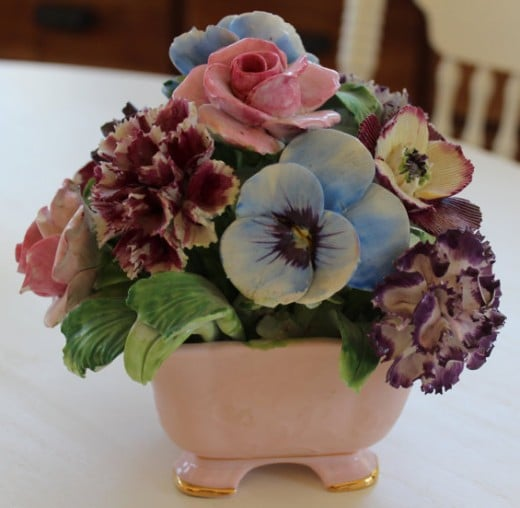
Then I noticed one in a thrift store. It was larger than mine at home. It also had a variety of flowers: carnations, a violet and the roses too. It had one flower which was an unusual orange sort of colour. I bought it for a dollar.
It was a bit dirty and had two flower petals chipped off at the tips. I put it in a sink of soapy, warm water. Let it soak awhile. I've heard that's a good thing for any kind of China, otherwise it can dry out, especially if it's not being used and washed regularly.
I set it out to dry out well after the washing. I tipped it on different angles to be sure any water had drained out. Having it tipped lets you make sure it won't have water left inside which could gradually drain out and become mould when it's displayed on a shelf. It's not a bad idea to put something under your knickknacks to be sure it can drain and dry out - when it has a hollow inside.
Hunting for Bone China Posies
This morning we are going to the thrift store, on the hunt. It's a big sale day and there are (or were) two large sized bone China posies in the display cabinet earlier this week. I'll get them, if they are still there and if they are in good shape. Today the thrift store has a 75 percent off sale for it's ten year anniversary. So, if they are there, it will be quite a sale price. If they aren't there, I would have liked to at least see them, but I do have enough of them, realistically.
I have a little collection of brooches too. When I first noticed this idea I loved it because it would be a great way to bring all my brooches out of hiding and have them displayed so I can see them all again.
Brooch bouquets began as a wedding thing. I've seen them used in for other occasions since then, including a memorial. They are gorgeous, they can be vintage or a great way to repurpose brooches and jewelry you have stashed at the bottom of your jewelry box (or picked out at the local thrift store).
Add your own uniqueness to your own bouquet. Make it yourself, it's a bit time consuming but not difficult. Pick the colours you want, or work with rhinestone, pearl or metallic brooches only. Use other jewelry, broken or out dated necklaces can be wrapped around or clip off the chain and wire them up like another flower in the bouquet.
Some bouquets are made with plastic flowers, or buttons or beads instead of brooches. You can also add silk or other artificial flowers to your bouquet, mix it up.
Finish it off by wrapped florist tape around all the wires to hide them and keep them from poking holes or rips into anything.
Then get ribbon, fabric or whatever you like to wrap around the stems of your bouquet. Add a lace doily or crocheted lace to the top of your bouquet, just as they would have it wrapped up in something extra pretty at the florist shop. I've seen people add tiny brooches to the wrapped up stems too. A little extra pretty touch.
Picking Brooches
Not everyone has a stash of brooches on hand. I have some from my Grandmother and her sisters. They're in my jewellery box, a small collection.
I've seen great brooches in the thrift store. But you should be a little picky, to keep it special. Pick brooches which have some meaning to you. Brooches with a design you especially like. Brooches that aren't just cheap made either. You're going to be handing the brooches you add to your bouquet so they should be able to stand up to being used, poked and prodded around.
If you are using vintage brooches check the settings, see if there are loose stones, beads, etc. Don't use a brooch that is already in need of some repair or too fragile.