Posts in category “Creative Fat Grrl”
Posted on . Filed in . Tagged with .

Repurpose Vintage Denim: Make a Purse

A denim purse has great looks, great style and does great when it comes to wear and tear. Wouldn't you like a denim purse, backpack, book bag, or some other denim purse sort of thing for yourself?

Almost every purse or backpack I have bought myself has been denim. My Mother made me a denim purse when I was a high school kid too. I remember how often people commented about that purse, in good ways.

I do my own sewing but I've stuck with embroidery and sewing by hand. Most of the sewing I do is mending, hemming and Christmas crafts/ ornaments. I do have a sewing machine but I've hardly done more than unpack it and pack it up again each time I move to a new address. I always intend to use it, get comfortable with how it works. There are so many craft projects I could be taking on if I was using the machine and sewing patterns. Now sewing patterns are so much easier to get, for free even, online. There really is not good reason not to get that sewing machine out and make great things with it.

I want to make my own purse, backpack or bookbag from recycled (upcycled) denim and trimmings. I'm going to start by looking at patterns and ideas. I like a purse with lots of pockets and niches to stash things and keep from having everything tossed into one central big pouch. I also want good straps, since they seem to wear out sooner than anything else on the purses I use. So those are the things I will be looking for in patterns.

General Plan for Sewing a Denim Purse

Start by giving the old jeans you want to use a wash in the machine. Dry them well and if they are wrinkled give them a touch of the iron to smooth them out.

Look at patterns for purses or backpacks or laundry bags, etc. You can do this without a pattern but the pattern is a good thing when it comes to the logistics and having a plan of how to pull it all together. Especially if you want extras like pockets, lining, inside pockets and dividers.

Don't begin cutting the jeans until you have a plan for the purse, backpack or bag you want to make. Draw a pattern for the main bag and extras like a handle. Fit them by pinning the pieces together and see how they hang - is a purse strap going to be too long or too short? Will you be able to fit your books into the book bag? Do you need a lining - which will mean cutting extra denim or recycling something else to have a different fabric for the lining.

Once you have your plan cut out the pieces, give extra space around the edge for the seam once they are sewn together. Cut the denim for the handle and any side pockets and such.

Sew on pockets and extras as you want them, not the purse strap however. Once you have the body of the purse all set and ready to be sewn together (including a lining if you want one) put the main pieces back to back (they should be inside out). Begin sewing around the edges. Leave the top open - but hem it if you have rough edges there.

Sew the purse strap on before you finish sewing the two parts of the body together. You should have left some room to tuck the ends of the strap into your seams. Or, sew extra seam and double sew over the straps for extra strength. Look at patterns for ideas on how to attach the strap to the purse if you aren't certain. Of course, if you use plastic handles it will be different from using a length from the jeans.

You can still decorate the purse with extras like pins, brooches and whatever else you dream up.
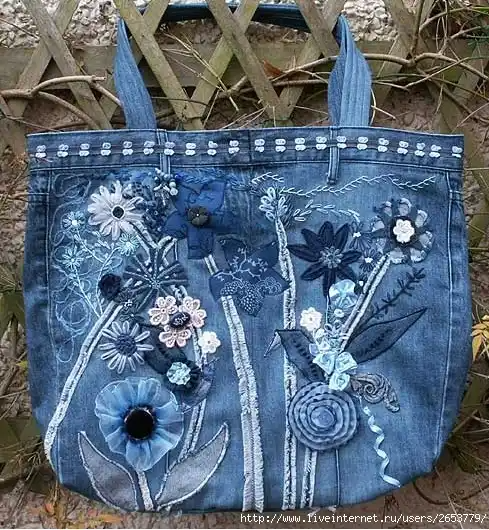
Found at a broken link. Including it because it's such a pretty idea.
Posted on . Filed in . Tagged with .

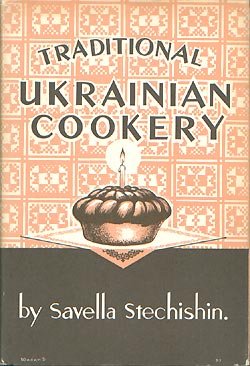
Traditional Ukrainian Cookery by Savella Stechishin

My Mother and I have both been watching for a copy of this cookbook. So far I have not found it where I can buy it at an affordable price for me. This one is going for $150, too much for me to fit into the budget even for this cookbook. Prices vary and most of the time it isn't available.

I first found this cookbook years ago when I was visiting my Aunt Emma (she was my Grandfather's sister, so my great-Aunt). She lived in British Columbia, Canada and I visited her a couple of summers when I travelled out on the Greyhound bus from Ontario. I had a lovely trip and one thing I very much remember still are all the great, traditional Ukrainian dishes we cooked. I wrote down some of the recipes and, when I was home again, I tried them myself. I had great success with one which was basically tomatoes cooked with butter, sour cream and cabbage. It was one of the most delicious things I have ever eaten, not what I expected from a dish which featured cabbage.

Anyway, Aunt Emma is gone and I never saw her cookbook again. I don't know who got it, or if anyone actually did. So I have kept watching for it to turn up.

When I was asked to write about a cookbook for Squidoo my first thought was, of course, this old Traditional Ukrainian Cookbook. I found two on Amazon, but one is without the cover and both are pretty over my meagre budget. I'm not giving up hope on finding one for myself. More and more cookbooks are turning up in thrift stores as people are finding recipes online rather than using printed cookbooks. So, I'm sure my cookbook will come.

My favourite recipe...

Hard to pick between the cabbage rolls we have been making for as long as I can remember or the recipe from the cookbook with cabbage, tomatoes and sour cream - which I don't know the name of.

Posted on . Filed in . Tagged with .

For the Love of Russian Matryoshka Nesting Dolls

I'm a long time fan of the Russian Matryoshka nesting doll. The Russian doll sets appeal to me as something feminine, historical and cultural. They're pretty too. I've found all sorts of doll sets in various themes and mediums - not just the standard wooden doll any more.

I bought my first Matryoshka doll at the Canadian National Exhibition. I had wanted one for years, since the first time I noticed them at the CNE (or The Ex, as we also called it).

I didn't know anything about the Russian dolls then, not even the right name for them. A lot of people don't know them by anything more than "that Russian doll set". The proper name is Matryoshka (other spellings - Matroishka and Matreshka). They are also called nesting dolls or stacking dolls.

I had seen them here and there and thought they were pretty, but more than that, I saw the history and the legacy to them. I have always been a history fan. Those Russian dolls were far too well known and wide spread to be something without a great history to them.

The First Russian Nesting Doll

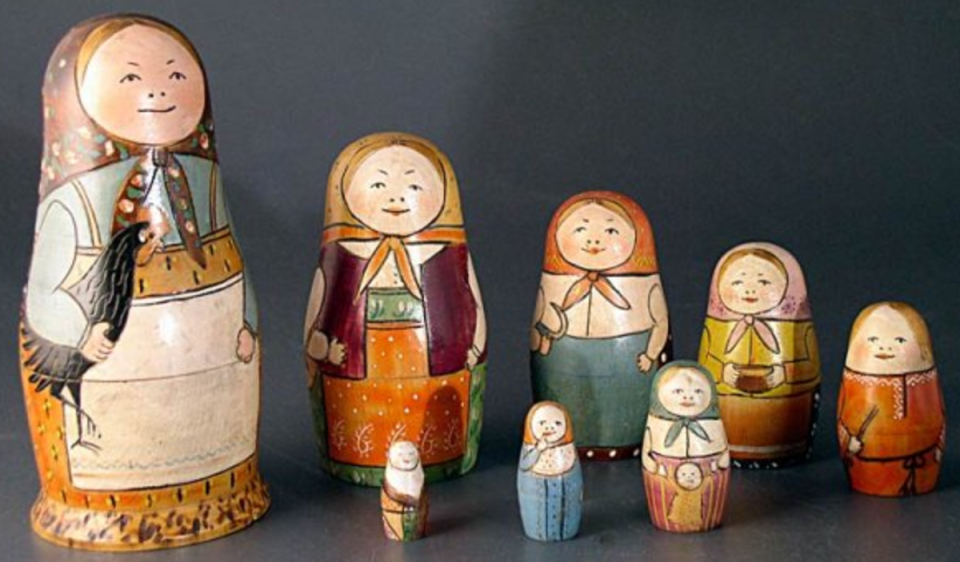
The first doll set was carved in 1890 by Vasily Zvyozdochkin from a design by Sergey Malyutin (a folk crafts painter). The doll set was painted by Malyutin, eight dolls staring with a girl in a traditional dress holding a rooster. The inner dolls were girls and a boy, the smallest was a baby.

Zvyozdochkin and Malyutin were inspired by a Japanese made doll. In turn, I read the Japanese say this doll was inspired by a Russian monk originally.

Traditional Matryoshka dolls have the theme with women and girls in traditional Russian dress. However, new dolls can have any random theme under the sun. Try looking up nesting dolls and anything other theme or idea and see what you find. Chances are there will be something in any theme for anyone who wants them.

I'm more of a traditional type. I like the history and prettiness of the doll in her Russian dress/ costume. Especially those with flowers painted on the skirts. But, I do have a weakness for the winter set too. All blue and white colours with snowflakes instead of flowers.

The first Matryoshka doll set are displayed in the Museum of Toys in Russia.

I like retro, vintage, old things. Choosing to preserve or repurpose is her dilemma - can't change your mind once started.

Posted on . Filed in . Tagged with .

Paper Flowers Never Die

Paper flowers are more than rolled up newspaper or cut up bits of paper stuck together. There is a trick to getting the right look and shape to form flowers. But, you can use a variety of paper from tissue paper, crepe paper, newspapers to toilet paper even. You can also use paper quilling and origami as techniques in making your flowers.

Toilet paper was made into flowers and used to decorate the car the bride and groom would drive away in at weddings. Now people use tissue paper or fancier paper stock to create the "Just Married" sign and decorate the car. When I made flowers for my brother's "Just Married" sign I used plastic to form the flowers. I guess that's great for weddings which get rained on. But, it wasn't as nice as the old paper flowers we used to make.

Don't forget origami when it comes to making paper flowers. Give yourself some time to practice with different paper folding ideas. Don't expect every flower to work out your first time around. It takes some practice to work out the bugs, especially for the complicated looking flowers. One nice way to get started by making pinwheel flowers.

For pinwheels you need a square of paper and then you cut four times from the corners to the inside. Leave the centre uncut. Take one corner at each cut corner and pull it into the centre. Pin each of the corners to the centre with one pin and fasten them there. Now you need a stick for it to spin from.

Quilling is also known as filigree. I haven't tried paper quilling. But, I know you roll, shape and glue paper together to create flowers and other art.

Consider recycling gift wrapping paper as paper flowers. Magazines, with their glossy pages, make good flowers too.

Posted on . Filed in . Tagged with .

Make your own Ribbon Flower Bouquet

I often see yards and yards of ribbon at the thrift store. Someone needs to find a use for all of that ribbon. Flowers would be a great way to repurpose ribbon. There are so many varieties of ribbon flowers too. I've seen a lot of carnations, daisies and of course, roses. But, once you get the basic method you should be able to come up with unique patterns for your own style of ribbon flower making.

Once you have made a few ribbon flower heads you can attach them to hair bands, use them when wrapping gifts/ presents and make them longer but attaching flower stems so they can sit in a vase. I've got an old one from days long ago which is still on my door knob, on the inside door where I seldom disturb it but get to see it often.

I've already written about ribbon embroidery. Making flowers out of ribbons is different because it's not embroidery. Instead of sewing with ribbon onto cloth, you are forming the ribbons into flowers, 3-D flowers rather than the (bumpy but mainly flat) 2-D flowers created with ribbon embroidery.

If you want to cheer up a friend, ribbon flowers are a good option. They can be taken into hospitals too because they have none of the qualities of real flowers, other than being cheerful, colourful and pretty.